Crear una web con WordPress, en un servidor Linux con Docker, Apache2 y con un certificado ssl en Let’s Encrypt y un dominio en Namecheap
Vamos a crear un servidor Linux en un droplet de DigitalOcean, instalar WordPress en un contenedor Docker, configurarlo para que funcione con Apache2 y asegurarlo con HTTPS utilizando un certificado gratuito de Let’s Encrypt. Además, configuraremos un dominio en Namecheap. Aquí tienes los pasos detallados:
Paso 1: Crear un Droplet en DigitalOcean
- Inicia sesión en tu cuenta de DigitalOcean.
- Haz clic en «Create» y selecciona «Droplets».
- Elige una imagen de Ubuntu (por ejemplo, Ubuntu 20.04).
- Selecciona el tamaño del droplet según tus necesidades.
- Configura las opciones adicionales según tus preferencias.
- Asigna un nombre al droplet y haz clic en «Create Droplet».
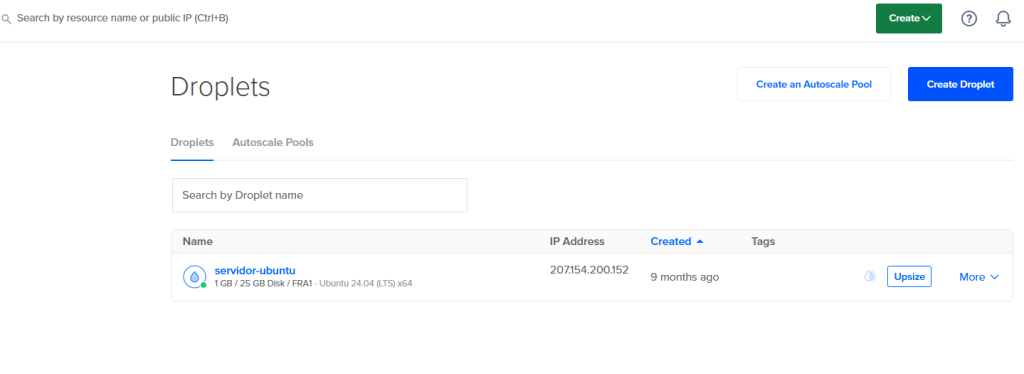
Paso 2: Conectar al Droplet
- Una vez creado el droplet, obtén la dirección IP pública.
- Conéctate al droplet utilizando SSH:
ssh root@your_droplet_ipTambién puedes conectarte através de la consola desde Digitalocean:
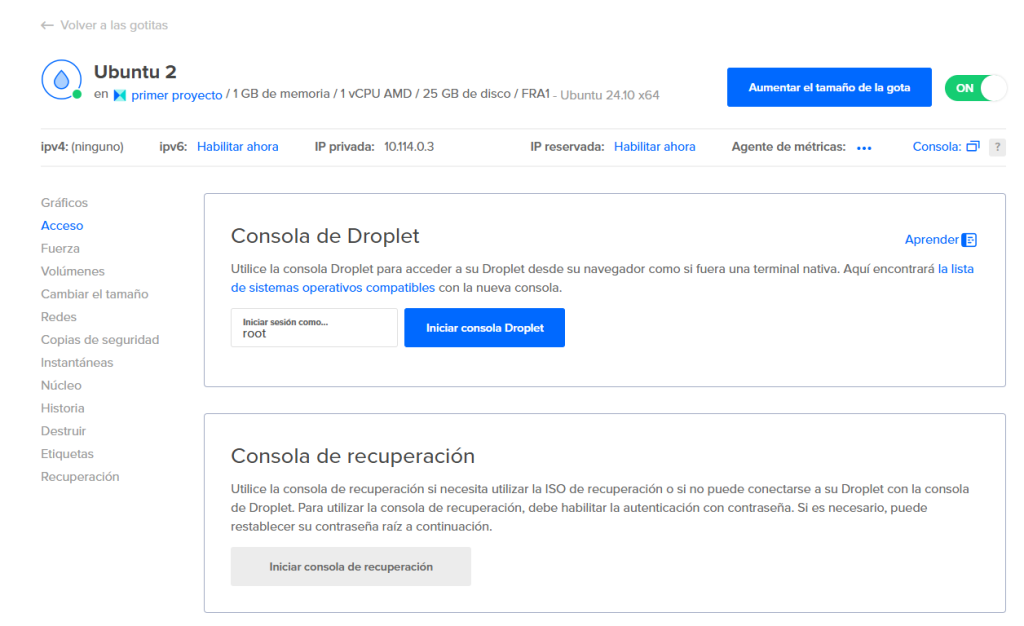
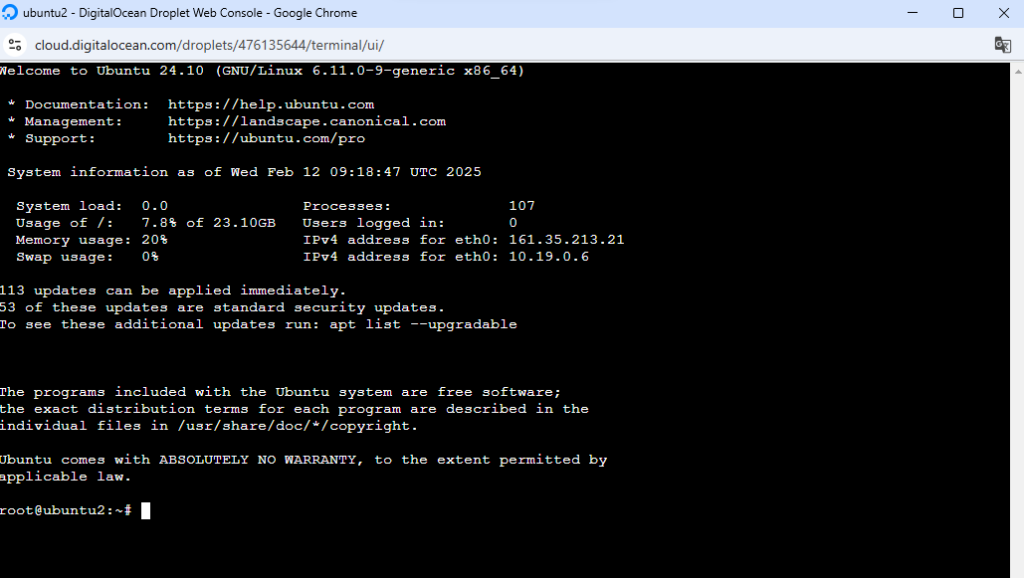
Paso 3: Instalar Docker y Docker Compose
- Actualiza los paquetes del sistema:
apt update && apt upgrade -y2. Instala Docker:
apt install docker.io -yComprueba que está instalado:
root@ubuntu2:~# docker

Usage:  docker [OPTIONS] COMMAND

A self-sufficient runtime for containers

Common Commands:
  run         Create and run a new container from an image
  exec        Execute a command in a running container
  ps          List containers
  build       Build an image from a Dockerfile
  pull        Download an image from a registry
  push        Upload an image to a registry
  images      List images
  login       Log in to a registry
  logout      Log out from a registry
  search      Search Docker Hub for images
  version     Show the Docker version information
  info        Display system-wide information

Management Commands:
  builder     Manage builds
  container   Manage containers
  context     Manage contexts
  image       Manage images
  manifest    Manage Docker image manifests and manifest lists
  network     Manage networks
  plugin      Manage plugins
  system      Manage Docker
  trust       Manage trust on Docker images
  volume      Manage volumes

Swarm Commands:
  swarm       Manage Swarm

Commands:
  attach      Attach local standard input, output, and error streams to a running container
  commit      Create a new image from a container's changes
  cp          Copy files/folders between a container and the local filesystem
  create      Create a new container
  diff        Inspect changes to files or directories on a container's filesystem
  events      Get real time events from the server
  export      Export a container's filesystem as a tar archive
  history     Show the history of an image
  import      Import the contents from a tarball to create a filesystem image
  inspect     Return low-level information on Docker objects
  kill        Kill one or more running containers
  load        Load an image from a tar archive or STDIN
  logs        Fetch the logs of a container
  pause       Pause all processes within one or more containers
  port        List port mappings or a specific mapping for the container
  rename      Rename a container
  restart     Restart one or more containers
  rm          Remove one or more containers
  rmi         Remove one or more images
  save        Save one or more images to a tar archive (streamed to STDOUT by default)
  start       Start one or more stopped containers
  stats       Display a live stream of container(s) resource usage statistics
  stop        Stop one or more running containers
  tag         Create a tag TARGET_IMAGE that refers to SOURCE_IMAGE
  top         Display the running processes of a container
  unpause     Unpause all processes within one or more containers
  update      Update configuration of one or more containers
  wait        Block until one or more containers stop, then print their exit codes

Global Options:
      --config string      Location of client config files (default "/root/.docker")
  -c, --context string     Name of the context to use to connect to the daemon (overrides DOCKER_HOST env
                           var and default context set with "docker context use")
  -D, --debug              Enable debug mode
  -H, --host list          Daemon socket to connect to
  -l, --log-level string   Set the logging level ("debug", "info", "warn", "error", "fatal") (default "info")
      --tls                Use TLS; implied by --tlsverify
      --tlscacert string   Trust certs signed only by this CA (default "/root/.docker/ca.pem")
      --tlscert string     Path to TLS certificate file (default "/root/.docker/cert.pem")
      --tlskey string      Path to TLS key file (default "/root/.docker/key.pem")
      --tlsverify          Use TLS and verify the remote
  -v, --version            Print version information and quit

Run 'docker COMMAND --help' for more information on a command.

For more help on how to use Docker, head to https://docs.docker.com/go/guides/
3. Instala Docker Compose:
apt install docker-compose -yComprueba que se ha instalado:
root@ubuntu2:~# docker-
docker-compose  docker-init     docker-proxy
root@ubuntu2:~# docker-compose
Define and run multi-container applications with Docker.

Usage:
  docker-compose [-f <arg>...] [--profile <name>...] [options] [--] [COMMAND] [ARGS...]
  docker-compose -h|--help

Options:
  -f, --file FILE             Specify an alternate compose file
                              (default: docker-compose.yml)
  -p, --project-name NAME     Specify an alternate project name
                              (default: directory name)
  --profile NAME              Specify a profile to enable
  -c, --context NAME          Specify a context name
  --verbose                   Show more output
  --log-level LEVEL           Set log level (DEBUG, INFO, WARNING, ERROR, CRITICAL)
  --ansi (never|always|auto)  Control when to print ANSI control characters
  --no-ansi                   Do not print ANSI control characters (DEPRECATED)
  -v, --version               Print version and exit
  -H, --host HOST             Daemon socket to connect to

  --tls                       Use TLS; implied by --tlsverify
  --tlscacert CA_PATH         Trust certs signed only by this CA
  --tlscert CLIENT_CERT_PATH  Path to TLS certificate file
  --tlskey TLS_KEY_PATH       Path to TLS key file
  --tlsverify                 Use TLS and verify the remote
  --project-directory PATH    Specify an alternate working directory
                              (default: the path of the Compose file)
  --compatibility             If set, Compose will attempt to convert keys
                              in v3 files to their non-Swarm equivalent (DEPRECATED)
  --env-file PATH             Specify an alternate environment file

Commands:
  build              Build or rebuild services
  config             Validate and view the Compose file
  create             Create services
  down               Stop and remove resources
  events             Receive real time events from containers
  exec               Execute a command in a running container
  help               Get help on a command
  images             List images
  kill               Kill containers
  logs               View output from containers
  pause              Pause services
  port               Print the public port for a port binding
  ps                 List containers
  pull               Pull service images
  push               Push service images
  restart            Restart services
  rm                 Remove stopped containers
  run                Run a one-off command
  scale              Set number of containers for a service
  start              Start services
  stop               Stop services
  top                Display the running processes
  unpause            Unpause services
  up                 Create and start containers
  version            Show version information and quit
Paso 4: Crear un Contenedor Docker para WordPress
- Crea un directorio para tu proyecto:
mkdir wordpress && cd wordpress 2. Crea un archivo docker-compose.yml con el siguiente contenido:
version: '3.1'

services:
  wordpress:
    image: wordpress:latest
    restart: always
    ports:
      - 80:80
    environment:
      WORDPRESS_DB_HOST: db
      WORDPRESS_DB_USER: exampleuser
      WORDPRESS_DB_PASSWORD: examplepass
      WORDPRESS_DB_NAME: exampledb
  db:
    image: mysql:5.7
    restart: always
    environment:
      MYSQL_DATABASE: exampledb
      MYSQL_USER: exampleuser
      MYSQL_PASSWORD: examplepass
      MYSQL_ROOT_PASSWORD: rootpassword
3. Inicia los contenedores:
docker-compose up -d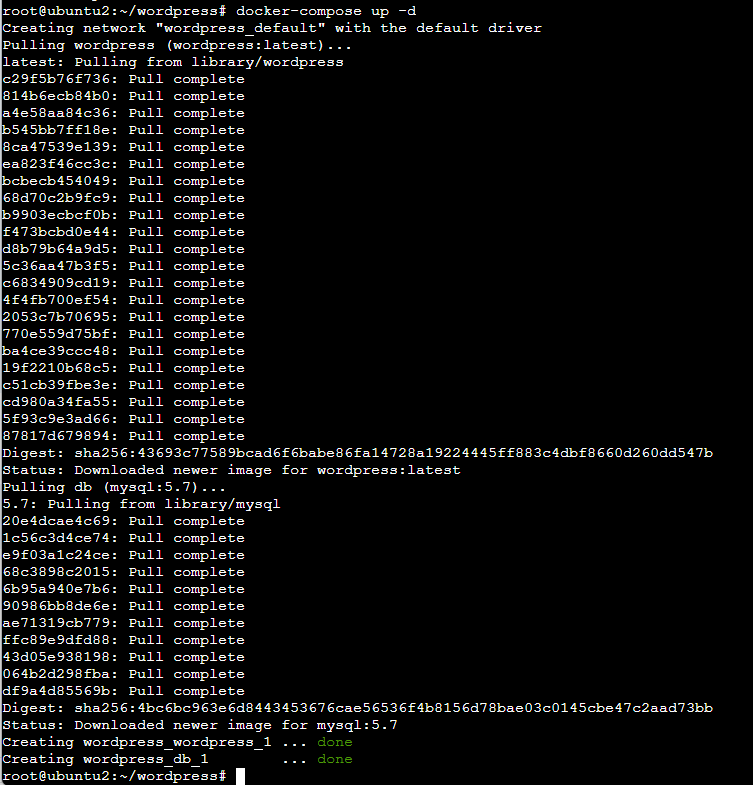
Comprueba las imagenes y contenedores:

Paso 5: Instalar Apache2
- Instala Apache2:
apt install apache2 -y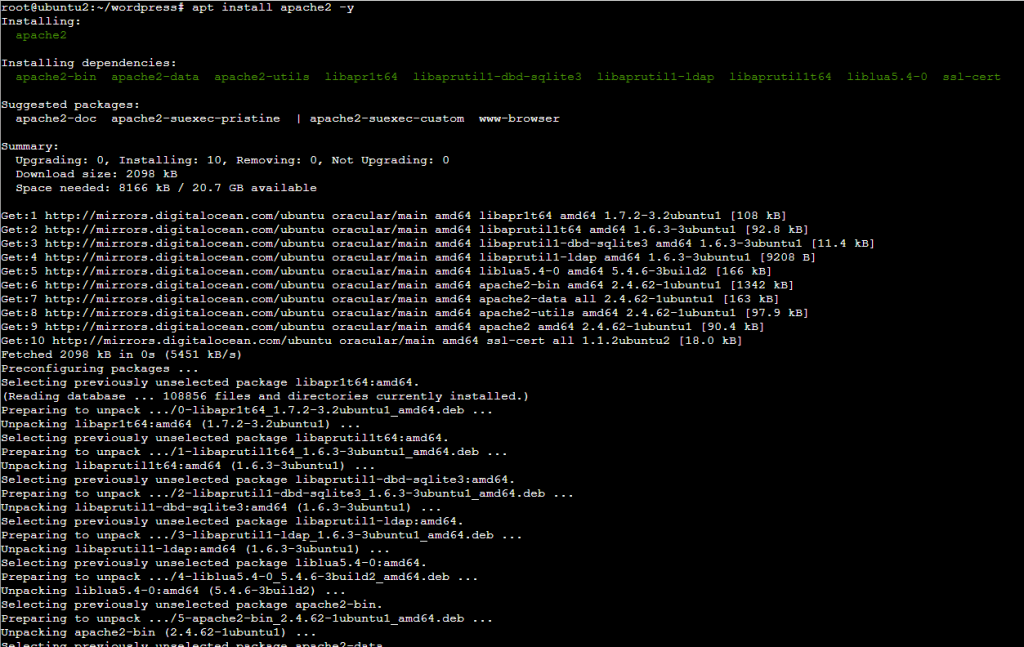
Detener el contenedor Docker de WordPress temporalmente para liberar el puerto 80
Comprobamos que está activo el servicio apache2, y que se muestra la pagina de apache2 en la url de la ip en el navegador.
root@ubuntu2:~/wordpress# docker-compose down
Stopping wordpress_db_1        ... done
Stopping wordpress_wordpress_1 ... done
Removing wordpress_db_1        ... done
Removing wordpress_wordpress_1 ... done
Removing network wordpress_default
root@ubuntu2:~/wordpress# systemctl restart apache2
root@ubuntu2:~/wordpress# systemctl status apache2
● apache2.service - The Apache HTTP Server
     Loaded: loaded (/usr/lib/systemd/system/apache2.service; enabled; preset: enabled)
     Active: active (running) since Wed 2025-02-12 10:32:21 UTC; 2min 58s ago
 Invocation: 7605bfbb958d4cb5a48784561e3bfd3c
       Docs: https://httpd.apache.org/docs/2.4/
    Process: 19643 ExecStart=/usr/sbin/apachectl start (code=exited, status=0/SUCCESS)
   Main PID: 19646 (apache2)
      Tasks: 55 (limit: 1110)
     Memory: 7.3M (peak: 7.5M)
        CPU: 60ms
     CGroup: /system.slice/apache2.service
             ├─19646 /usr/sbin/apache2 -k start
             ├─19648 /usr/sbin/apache2 -k start
             └─19649 /usr/sbin/apache2 -k start

Feb 12 10:32:21 ubuntu2 systemd[1]: Starting apache2.service - The Apache HTTP Server...
Feb 12 10:32:21 ubuntu2 apachectl[19645]: AH00558: apache2: Could not reliably determine the server's fully qualified domain name, using 127.0.1.1. Set t>
Feb 12 10:32:21 ubuntu2 systemd[1]: Started apache2.service - The Apache HTTP Server.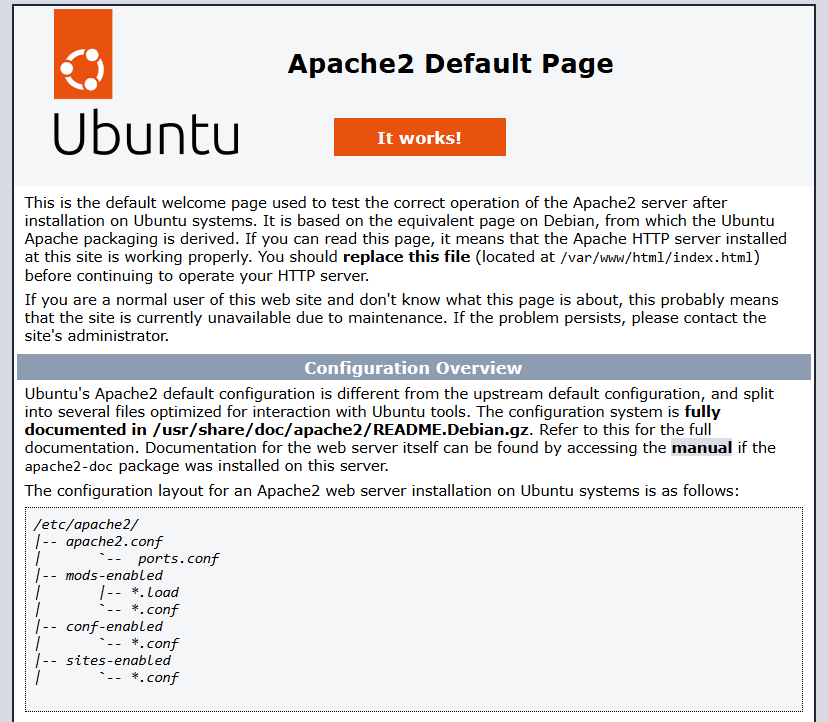
Para asegurarte de que no queden contenedores, imágenes o volúmenes innecesarios, aquí tienes algunos comandos útiles:
// Elimina contenedores detenidos
docker container prune
// Elimina imagenes no utilizadas
docker image prune
// Elimina todos los volumenes no utilizados
docker volume prune
// Eliminar todo (contenedores, imágenes, volúmenes y redes no utilizados)
docker system prune -a
root@ubuntu2:~/wordpress# docker images
REPOSITORY TAG IMAGE ID CREATED SIZE
wordpress latest f5650165f084 2 months ago 701MB
mysql 5.7 5107333e08a8 14 months ago 501MB
root@ubuntu2:~/wordpress# docker ps
CONTAINER ID IMAGE COMMAND CREATED STATUS PORTS NAMES
root@ubuntu2:~/wordpress# docker ps -a
CONTAINER ID IMAGE COMMAND CREATED STATUS PORTS NAMES
root@ubuntu2:~/wordpress# docker system prune -a
WARNING! This will remove:
- all stopped containers
- all networks not used by at least one container
- all images without at least one container associated to them
- all build cache
Are you sure you want to continue? [y/N] y
Deleted Images:
untagged: wordpress:latest
untagged: wordpress@sha256:43693c77589bcad6f6babe86fa14728a19224445ff883c4dbf8660d260dd547b
deleted: sha256:f5650165f08472ffc76660d4e85d2273e3ce2b89e57d7c35c7297033eef06d93
deleted: sha256:a5f5c6f977d5684e58d14688ac92730e1d6ffa821d5071894cbc874d160328c8
deleted: sha256:dee6cd5df3f5b165051340f39888df55e80d06f18732ebf85ec0edc319149fcc
deleted: sha256:08bcdc26a5578c4bf66d61b7aa6c9e90ed3ac99f233c683ff3f5a63d3f41b662
deleted: sha256:6c0ec7a043a2136e3bc3bfc116e37f6c0ea3bd6e26550ef0d592cd0e12136ad7
deleted: sha256:53f233af98d44b56f49754e32494ba12267c676ab6c2e9068349ccb940c27542
deleted: sha256:9fa09233f350d992e24ff0d8645725899f09aa762ddc75ed958faff096fa3896
deleted: sha256:2694705dbe138b4024e2562c3303060e7fbbeb868b1ee2bb8f43a60ce4c2e514
deleted: sha256:574a4324fbe5c8607b519cd6a496abe959885a65a057cffad24d08087a9d0e3d
deleted: sha256:d445e09bd88229f3d4f229c11b70eb4548918283ec342d5c44b2b9d25899669b
deleted: sha256:f7843fdd59dcdd3c19a8a245c131b82048774d482c7a55ba7db8dd60e318a88a
deleted: sha256:7d88a8b24a262581dcc47208951d3974f551bfd29ad45b9b48f37a01db09cb86
deleted: sha256:42fb4428c42888e95ac35a924d334c76e6c061657c812a06b0dbe34dc6c4093e
deleted: sha256:2badaef8bad2c74ad4c49959772861bc0e38bf45c57439df225d00f7c3a88271
deleted: sha256:39ef75f0d7ee8478b2b1708ca95bed03f0965b01e1de4a6b9f620df406aa1325
deleted: sha256:81c7fc0dfce5c1f2880a8682886873b47d94dbb15fe3255ee2bc809bf78cd242
deleted: sha256:6ed2a7f576fe94a62a525f7c38d66f301555166d1b2fa323309775b537c5b44b
deleted: sha256:29a6c4c1aee5d96d0716c5c873c75120a9f525499171c59bb396c2d6af270abc
deleted: sha256:cbba25c37c216c1b5203d63a5712db9f8d34e827b79a35a959fa850cd2d43d45
deleted: sha256:08d6991bf0546b2686df21956c3ac3f8568a58ee55f67dc21a79be534b58dbba
deleted: sha256:43d6eb5ac80fb3378c3860d3f84ee30f884ec7c4a7af016d40d0b0d4ba894571
deleted: sha256:2bd8f8bc943407363ab38d9fc0e96bbd74014f3443a2547c17c90cfbb4ec91bf
deleted: sha256:7914c8f600f532b7adbd0b003888e3aa921687d62dbe2f1f829d0ab6234a158a
untagged: mysql:5.7
untagged: mysql@sha256:4bc6bc963e6d8443453676cae56536f4b8156d78bae03c0145cbe47c2aad73bb
deleted: sha256:5107333e08a87b836d48ff7528b1e84b9c86781cc9f1748bbc1b8c42a870d933
deleted: sha256:37fd5f1492d4e9cb540c52c26655f220568050438f804275e886200c8807ffb4
deleted: sha256:1105a50d3483cb9f970e70cf5163e3352f0b2fe2ff07c6abcca6f34228e76dc5
deleted: sha256:94187496c18bb11b78e71017f2774ad3c0a734da9749a46e917c4239504e9322
deleted: sha256:ae59716eae3be604a4fd43e86fd2ad504cb06c89cc064c73c78eee651e675805
deleted: sha256:97d26ca29ec287ff4bd09a49602c44cbcabcf3303ddc726b3b94cbe26dfe1c94
deleted: sha256:27303974d12144264b32b8936ca7c90d72bdba939a9e791010201b3b1717c4c4
deleted: sha256:4d4483f06dbe01282c10cb9e429a0be826c18c61048f7860dad49ae7f6bac927
deleted: sha256:3b73a6f6b3298c568dcfb8fa5e96c581a1b5c0ad395b0c38f9addd0c79703124
deleted: sha256:46446bf265a411a4a13a4adc86f60c9e0479a2e03273c98cafab7bc4151dd2bc
deleted: sha256:1d5264146b09a27a8fc6801dc239a4962582ed27dd2fbd8ee708463a1857b06b
deleted: sha256:cff044e186247f93aa52554c96d77143cc92f99b2b55914038d0941fddeb6623
Total reclaimed space: 1.202GB
root@ubuntu2:~/wordpress# docker images
REPOSITORY TAG IMAGE ID CREATED SIZEVamos a modificar el archivo docker-compose.yml para que el contenedor Docker de WordPress utilice el puerto 8080 en lugar del puerto 80:
version: '3.1'

services:
  wordpress:
    image: wordpress:latest
    restart: always
    ports:
      - 8080:80
    environment:
      WORDPRESS_DB_HOST: db
      WORDPRESS_DB_USER: exampleuser
      WORDPRESS_DB_PASSWORD: examplepass
      WORDPRESS_DB_NAME: exampledb
  db:
    image: mysql:5.7
    restart: always
    environment:
      MYSQL_DATABASE: exampledb
      MYSQL_USER: exampleuser
      MYSQL_PASSWORD: examplepass
      MYSQL_ROOT_PASSWORD: rootpassword
2. Configura Apache2 para que funcione con Docker:
a2enmod proxy proxy_http 3. Crea un archivo de configuración para tu sitio en /etc/apache2/sites-available/wordpress.conf:
<VirtualHost *:80>
    ServerName your_domain
    ProxyPass / http://localhost:80/
    ProxyPassReverse / http://localhost:80/
</VirtualHost>
4. Habilita el sitio y reinicia Apache2:
a2ensite wordpress
systemctl restart apache2
Antes de crear el VirtualHost con SSL, necesitas obtener e instalar un certificado SSL de Let’s Encrypt. A continuación, te explico los pasos para hacerlo, junto con la configuración del VirtualHost teniendo en cuenta tu situación actual.
Paso 1: Instalar Certbot y Obtener el Certificado SSL de Let’s Encrypt
- Instala Certbot:
sudo apt-get update
sudo apt-get install certbot python3-certbot-apache
2. Obtener el Certificado SSL:
sudo certbot certonly --apache -d economicypolitic.infoSigue las instrucciones proporcionadas por Certbot para completar el proceso de validación y obtener el certificado SSL.
Paso 2: Configurar el VirtualHost con ProxyPass
Configuración Inicial del VirtualHost con IP (sin SSL):
- Abre el archivo de configuración de Apache,
wordpress.conf. - Añade la siguiente configuración para redirigir las solicitudes al puerto 8080 del contenedor:
<VirtualHost *:80>
    ServerAdmin webmaster@localhost
    ProxyPreserveHost On
    ProxyPass / http://127.0.0.1:8080/
    ProxyPassReverse / http://127.0.0.1:8080/
    ServerName 161.35.213.21

    ErrorLog ${APACHE_LOG_DIR}/error.log
    CustomLog ${APACHE_LOG_DIR}/access.log combined
</VirtualHost>
Configuración con Dominio y SSL:
- Actualiza el archivo de configuración del VirtualHost para incluir el dominio y SSL:
<VirtualHost *:80>
    ServerAdmin webmaster@localhost
    ProxyPreserveHost On
    ProxyPass / http://127.0.0.1:8080/
    ProxyPassReverse / http://127.0.0.1:8080/
    ServerName economicypolitic.info

    ErrorLog ${APACHE_LOG_DIR}/error.log
    CustomLog ${APACHE_LOG_DIR}/access.log combined

    # Redirigir todo el tráfico HTTP a HTTPS
    RewriteEngine on
    RewriteCond %{SERVER_NAME} =economicypolitic.info
    RewriteRule ^ https://%{SERVER_NAME}%{REQUEST_URI} [END,NE,R=permanent]
</VirtualHost>

<VirtualHost *:443>
    ServerAdmin webmaster@localhost
    ProxyPreserveHost On
    ProxyPass / http://127.0.0.1:8080/
    ProxyPassReverse / http://127.0.0.1:8080/
    ServerName economicypolitic.info

    ErrorLog ${APACHE_LOG_DIR}/error.log
    CustomLog ${APACHE_LOG_DIR}/access.log combined

    SSLEngine on
    SSLCertificateFile /etc/letsencrypt/live/economicypolitic.info/fullchain.pem
    SSLCertificateKeyFile /etc/letsencrypt/live/economicypolitic.info/privkey.pem
    SSLCertificateChainFile /etc/letsencrypt/live/economicypolitic.info/chain.pem
</VirtualHost>
Explicación de las Directivas Proxy:
- ProxyPreserveHost On: Mantiene el encabezado
Hostoriginal del cliente al reenviar la solicitud al servidor backend. Esto es útil para asegurar que el servidor backend maneje la solicitud correctamente basado en el nombre del host. - ProxyPass: Especifica la URL a la que Apache debe reenviar las solicitudes. En este caso, redirige todas las solicitudes al servidor en
http://127.0.0.1:8080/. - ProxyPassReverse: Reescribe las cabeceras de respuesta para que el cliente vea las URLs originales en lugar de las URLs internas del backend. Esto es útil para mantener la consistencia de las URL en las respuestas HTTP.
Habilitar Módulos y Reiniciar Apache:
- Habilita los módulos necesarios y reinicia Apache:
sudo a2enmod proxy
sudo a2enmod proxy_http
sudo a2enmod ssl
sudo systemctl restart apache2
Con esto, deberías estar listo para probar tu configuración primero con la IP y luego con el dominio y SSL.